Your cart is currently empty!
Create a handmade card that celebrates the Simple Moments
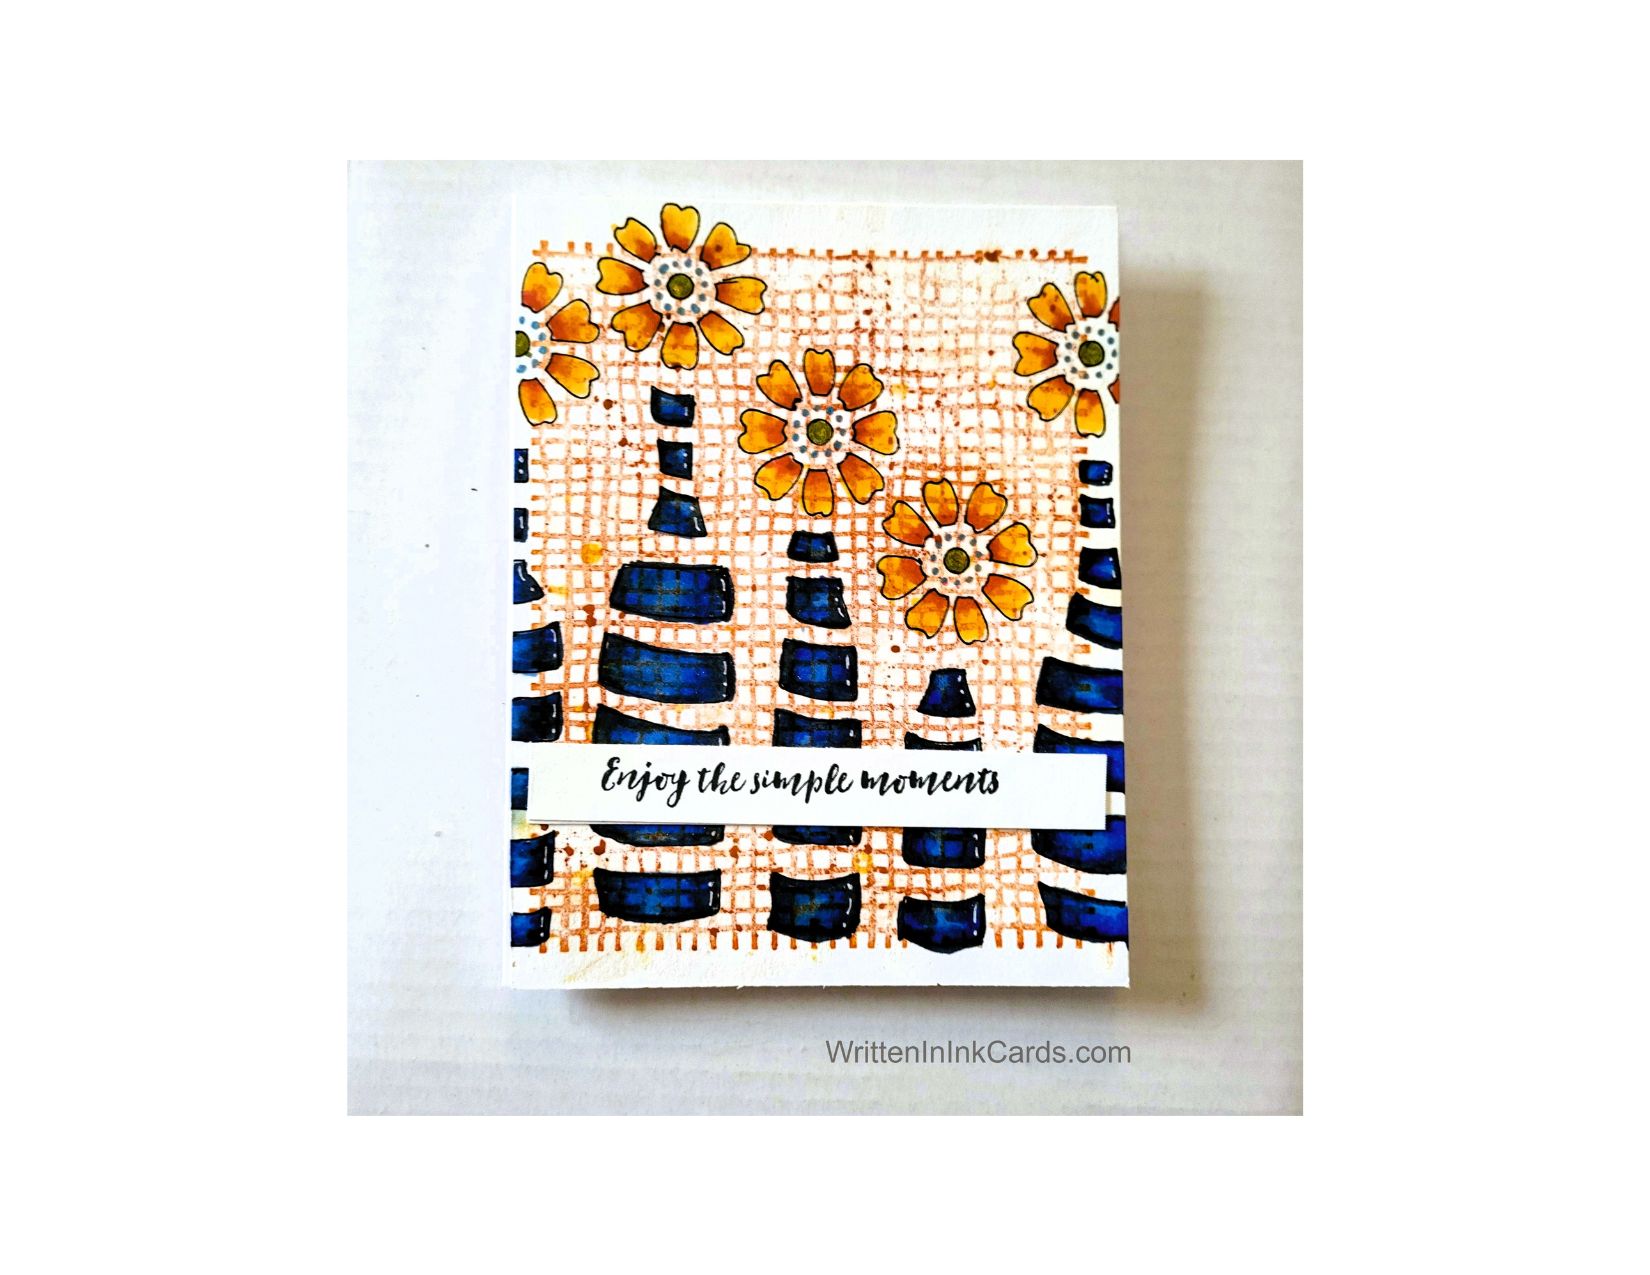

Sometimes the simple pleasures really are the best; it could be a smile from a loved one, sunshine on a spring day, or flowers in a vase.
Would you like to experiment with a design like this? You’ll find a supply list below, including a link to the stencil I used from A Colorful Life Designs. Follow the link and use discount code ChrisFan10 to save 10% on your entire order! (Master Creator Bundles are excluded as they already have a 20% discount built in.)
Let’s get Started:
Card Base: 5.5 x 8.5, scored and folded at 4.25
Card Face: 5.5 x 4.25
Card Face:
- I inked up the background stamp with orange ink, and laid it face up on my desk: then I placed the card face on top, doing my best to keep it straight.
- I laid a piece of scrap copy paper over this and ran my fingers over the entire surface to ensure ink transfer. (This is my preferred method when using a background stamp.
- I put the card face on my Grip Mat and used a black fineliner to trace the pattern onto the card face.
- I coloured the images with alcohol markers, adding white highlights with gel pen.
- I used a blue gel pen to add the dotted circle around the center of each blossom ( it doesn’t look blue in the image, but it is).
- I used a clear metallic pen to add sparkle to the center of each blossom: the centers had been coloured green with alcohol marker and the addition of the metallic ink activated that, creating a pretty greenish gold.
Other:
- I looked through my sentiment binder and selected one that was a good size for this bold image, and I felt this sentiment worked well too.
- The sentiment had been created on very light cardstock: I added a piece of heavier cardstock to the back to create stability.
Assembly
- I glued the card face directly to the card base.
- I added the sentiment as shown.
Final Thoughts:
I love this stamp and stencil combination: they work so very well together.
I was initially concerned about the orange ink showing through the colouring but then decided that it would just add depth and visual interest. I don’t mind the result, what do you think?
Supplies: (and links where possible)
I have listed which products I have used, and where they may be purchased. It’s a huge marketplace and in most instances, there are multiple sources and many alternatives to choose from.
Stencil: Bottled Posies, A Colorful Life Designs
Waffle Flower Grip Mat, 8.5 x 6.5, Scrapbook.com
Versamark Embossing Ink: Simon Says Stamp
Stamps: Weave, Technique Junkies (no longer available)
Fineliner: Amazon
Metallic Gel Pen: Sakura Gelly Roll, Amazon
White Gel Pen: Arteza, Amazon
Ink: Stampin’ Up!
Blending Brushes: Stampin’ Up!
Memento Ink: Stampin’ Up!
Alcohol Markers:
Stampin’ Blends: Stampin’ Up!
Copics: Wallacks
Adhesive: Tombow Aqua, Michaels
Card Base & Card Face: Accent 100 lb., Amazon
Do you have comments or thoughts to share on this design? Drop me a line in the Comments Section below – I’d love to hear from you!
You can also use the Comments Section to be added to the list, and notified when I release new work.
Leave a Reply