Your cart is currently empty!
How to Make a Stunning Debossed Card

Let’s get Started:
Card Base: 5.5 x 8.5, scored and folded at 425
Border Layer: 5.5 x 4
Card Face: 5.5 x 4 (before tearing)
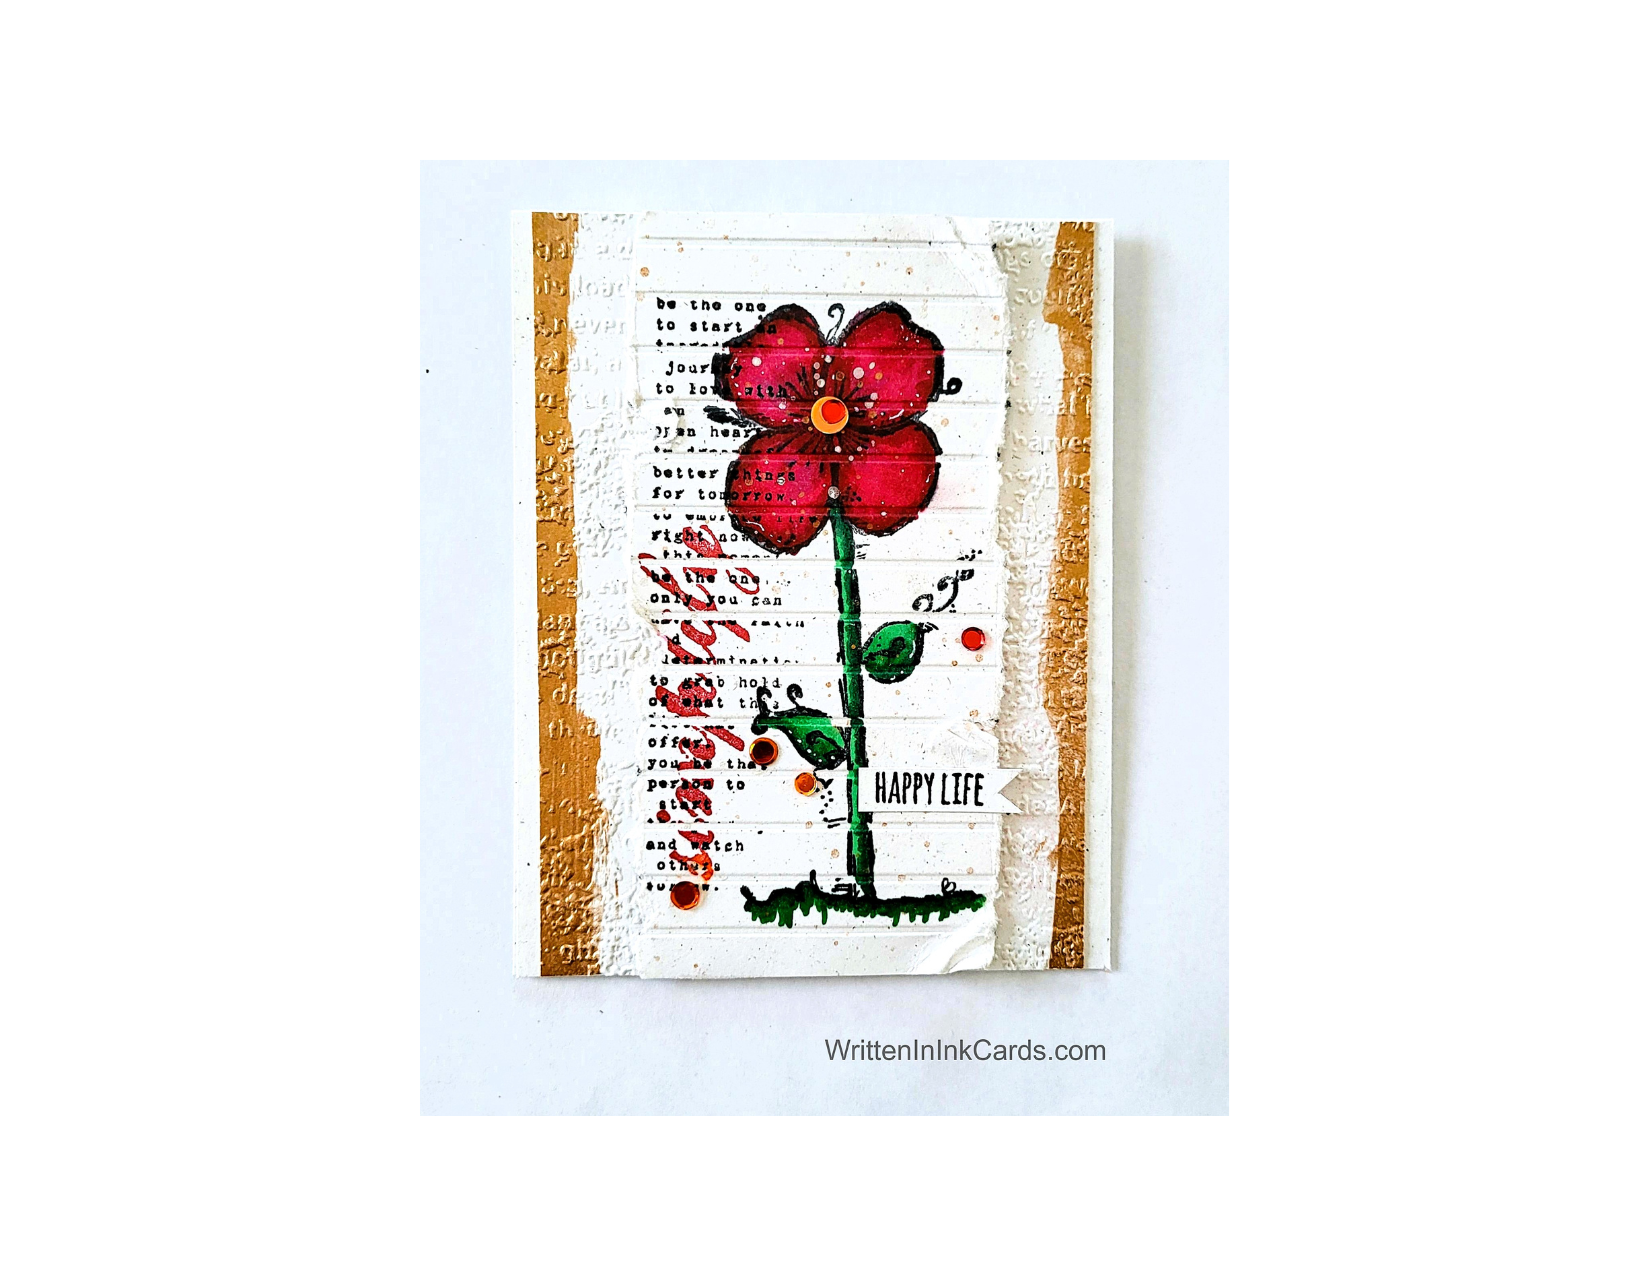
I had a card face which had been started but put aside: I had originally swiped black ink onto the surface and then I had put it into a striped embossing folder and run it through the Big Shot… and then put it aside. I picked this up one day, and thought “what would happen if I used the back of this as a base for an image? The stripes are debossed that way … it might be interesting.” And so it began.
Card Face:
- I stamped the flower onto the card face, followed by the long sentiment using black Memento ink for both. I overlapped the two deliberately.
- I coloured the flower using alcohol markers. While colouring the blossom, I accidentally filled in one of the debossed channels: there was nothing to do but continue doing that as I continued colouring the image.
- I wanted more colour, so I added the Simplify in red ink, to match the flower.
- I tore both sides off close to the image, distressing the edges quite a bit.
Other:
- I used a wide flat brush with gold watercolour paint and created a gold strip down both sides of the border piece: I deliberately created a jagged, irregular line as I went. Once this was dry, I placed it in an embossing folder and ran it through the Big Shot.
- I added spatter to the card face using both silver and gold watercolour paint.
- I stamped the “happy life” sentiment onto a narrow strip of scrap paper and then used my snips to create the flag on the right.
Assembly
- I glued the border layer to the card base, centering vertically.
- I put dimensional foam on the back of the card face and added this to the border layer, again centering vertically.
- I glued the sentiment onto the card face as shown.
- I added bling randomly to the card face.
Final Thoughts:
I’m really happy with this card: I like the look of the image stamped onto the debossed card face, and the tiny sentiment on the stem.
If I were to do this again, I would lightly touch a few of the torn edges of the card face with the same gold ink used elsewhere. This would have tied that element in quite nicely.
Supplies: (and links where possible)
I have listed which products I have used, and where they may be purchased. It’s a huge marketplace; in most instances, there are multiple sources and many alternatives.
Stamps: Bloom and Simplify, Unity Stamps (retired)
Metallic Watercolour Paint: Amazon
Ink: Stampin’ Up!
Blending Brushes: Stampin’ Up!
Versafine Onyx, Simon Says Stamp
Memento Ink: Stampin’ Up!
Alcohol Markers:
Stampin’ Blends: Stampin’ Up!
Copics: Wallacks
Bling: A Colorful Life Designs
Adhesive: Tombow Aqua, Michaels
Card Base & Card Face: Accent 100 lb., Amazon
Do you have comments or thoughts to share on this design? Drop me a line – I’d love to hear from you!
Leave a Reply