Your cart is currently empty!
Tag: bird
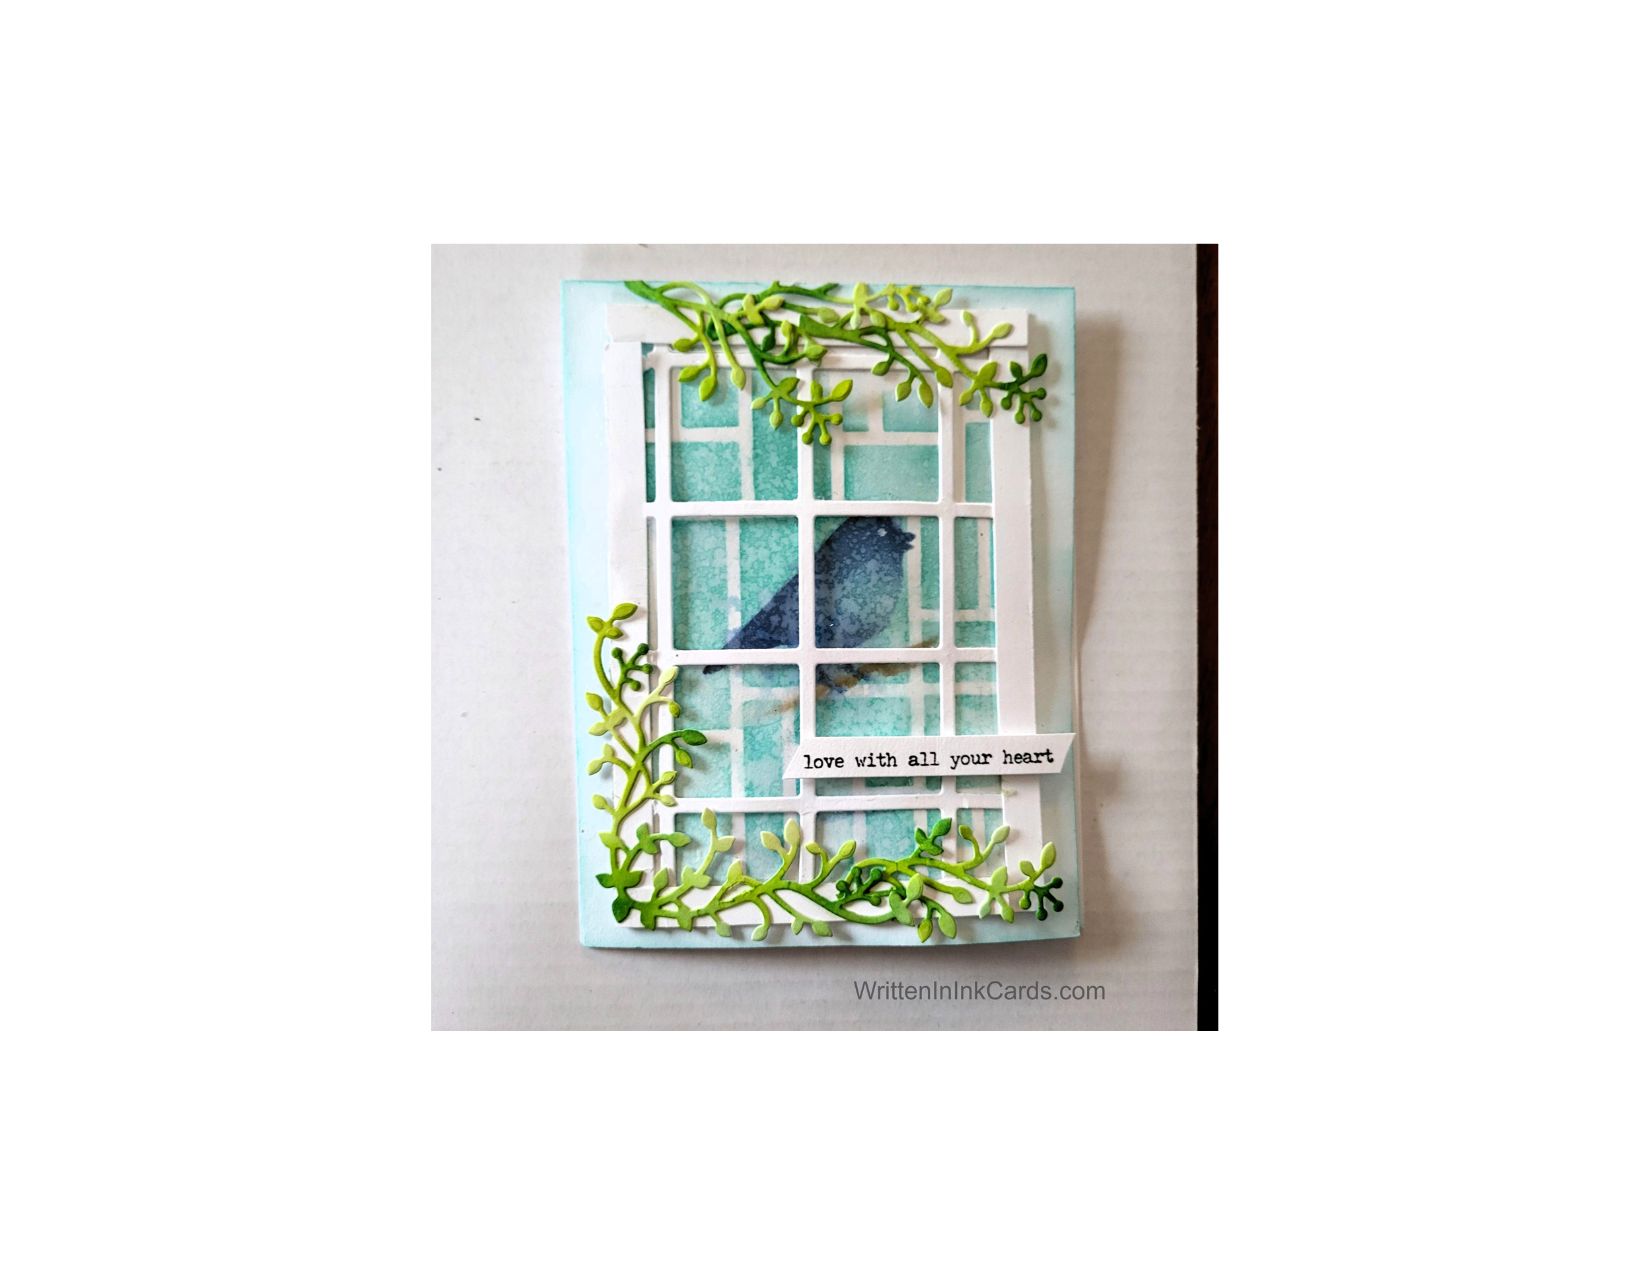
Create a card that Celebrates Singing After the Storm

Would you like to experiment with a design like this? You’ll find a supply list below, including a link to the stencils I used from A Colorful Life Designs. Follow the link and use discount code ChrisFan10 to save 10% on your entire order! (Master Creator Bundles are excluded as they already have a 20% discount built in.)
Let’s get Started:
Card Base: 5.5 x 8.5, scored and folded at 4.25
Border Layer: 5 x 3.75
Card Face: 5 x 3.75
White Cardstock to create window panels and window frame.
Acetate: 5 x 3.75
Card Face:
- I laid the card face onto the Grip Mat and positioned the MultiShadow stencil. I applied teal ink with a light hand.
- After removing this stencil, I positioned the Message Bird stencil, using a dark blue ink for the bird. I repositioned the stencil and added the branch with brown ink.
- Setting both stencils aside, I lightly spritzed water onto the card face to soften the lines and add depth.
Other:
- I used a “plaid” die to create the window panes.
- I didn’t have a rectangular die in the correct size to create the window frame: to get around this I cut 4 pieces of card stock, each ¼” wide and 5” long.
- I used a couple of dies to cut the foliage for the window and then brushed on a couple of different green inks.
- I brushed teal ink around all borders of the card base, allowing it to fade as it moved away from the edges.
- I found a great sentiment in my binder, ready and just waiting to be put to use.
Assembly
- I glued the card face to the card base, centering on all sides.
- I secured the acetate to the back of the window pane die cut and then secured this to the card face.
- I added the strips of cardstock to the outer edges of this, trimming to the correct size.
- I glued the foliage to the window as shown.
- I added the sentiment.
Final Thoughts:
I wanted to include acetate behind the window for the realistic shine it would provide: securing this to the card face and then the window proved very difficult and I would not include it another time.
I wanted the scene to have the look of being viewed through a window during a rainstorm, and I think I succeeded!
Supplies: (and links where possible)
I have listed which products I have used, and where they may be purchased. It’s a huge marketplace and in most instances, there are multiple sources and many alternatives to choose from.
Stencils:
MultiShadow , a Colorful Life Designs
Message Bird, A Colorful Life Designs
Waffle Flower Grip Mat, 8.5 x 6.5, Scrapbook.com
Ink: Stampin’ Up!
Blending Brushes: Stampin’ Up!
Versafine Onyx, Simon Says Stamp
Adhesive: Tombow Aqua, Michaels
Card Base & Card Face: Accent 100 lb., Amazon
Do you have comments or thoughts to share on this design? Drop me a line in the Comments Section below – I’d love to hear from you!
You can also use the Comments Section to be added to the list, and notified when I release new work.