Your cart is currently empty!
Tag: stencil
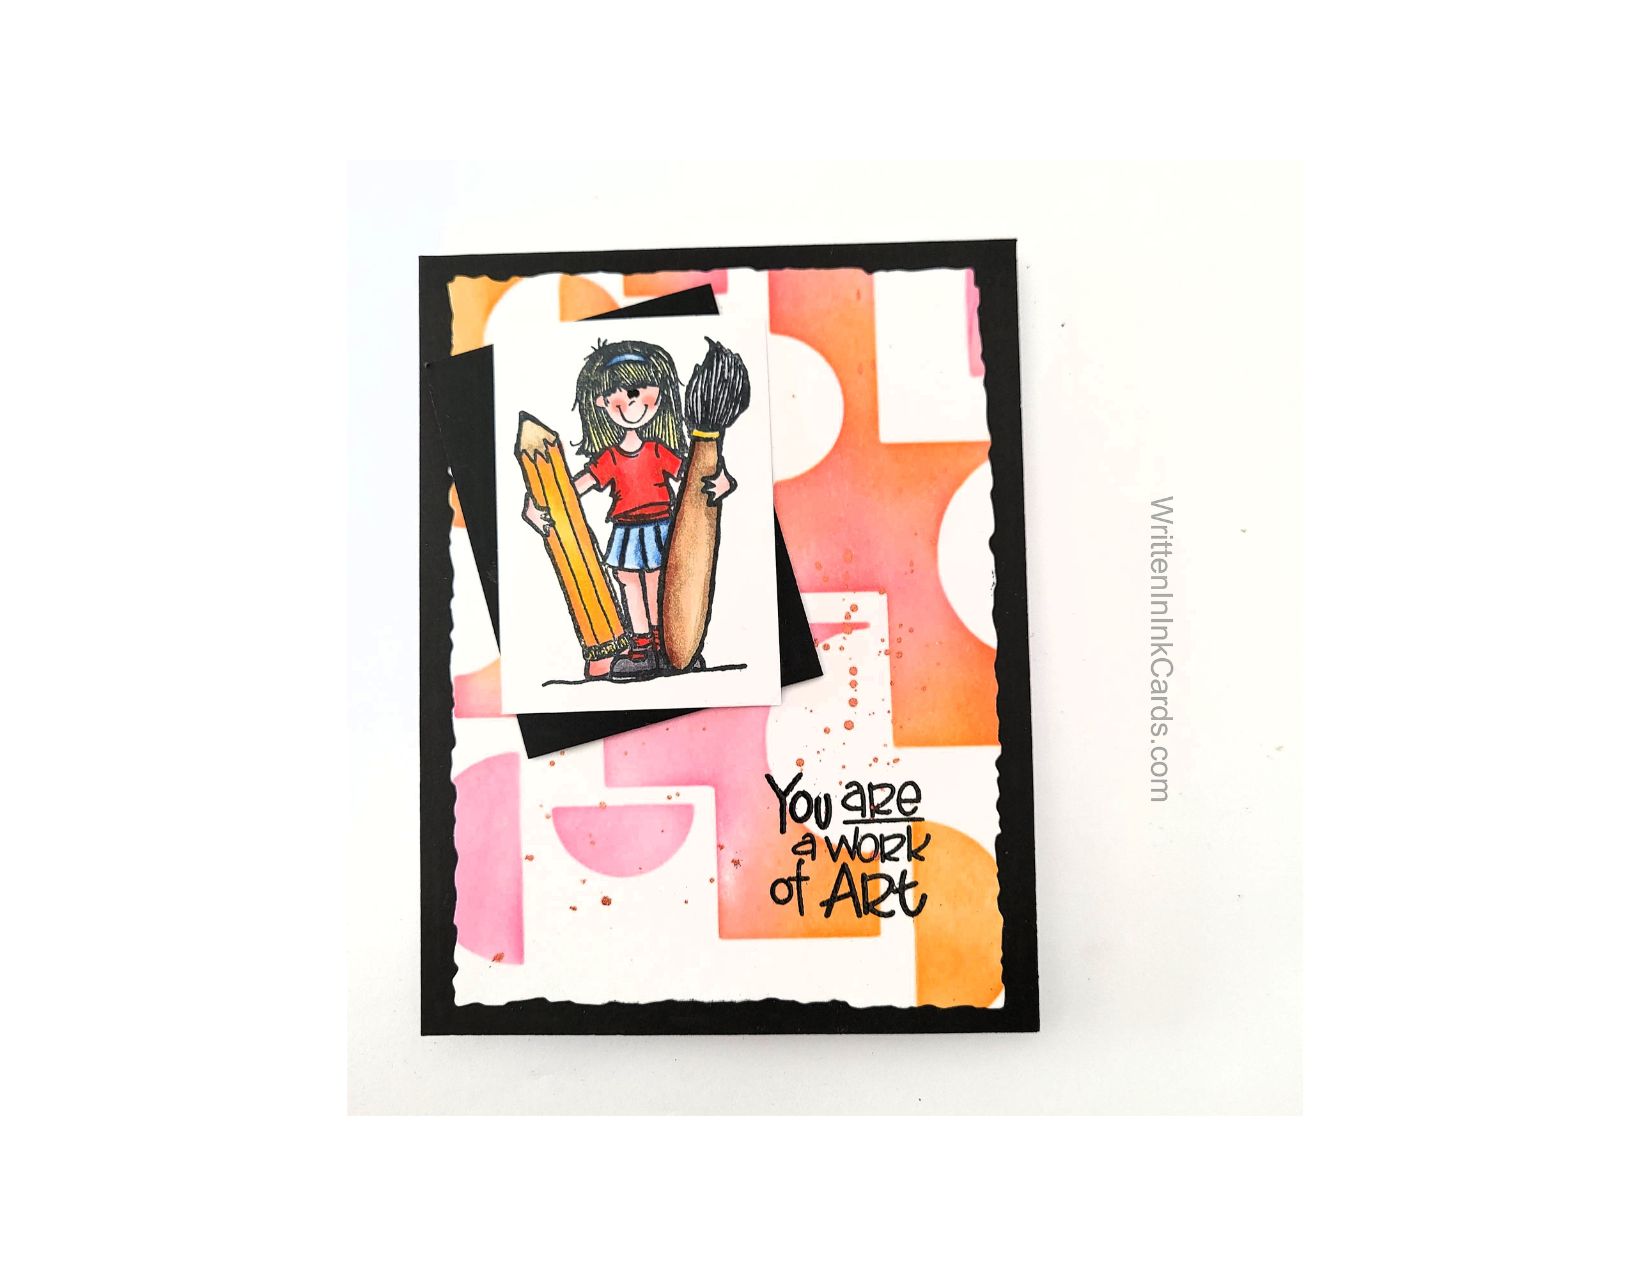
Celebrate someone special who is a work of art
Would you like to experiment with a design like this? You’ll find a supply list below, including a link to the stencil I used from A Colorful Life Designs. Follow the link and use discount code ChrisFan10 to save 10% on your entire order! (Master Creator Bundles are excluded as they already have a 20% discount built in.)
Let’s get Started:
Card Base: 5.5 x 8.5, scored and folded at 4.25
Border Layer: 5.5 x 4.25
Card Face: 5.5 x 4.25 (before die cut)
White Card Stock: 3 x 2
Black Cardstock: 3.25 x 2.25
Card Face:
- I began by laying the card face on my Grip Mat and positioning the stencil. I added pink and school bus yellow to the exposed areas, blending wherever the two colours met.
- Next I added metallic copper spatter towards the bottom left.
- After this dried, I finished the card face by putting it into my stamp positioner and adding the sentiment with Versafine Onyx.
- I used a deckled die to cut this down to the finished size.
Other:
- I stamped the image on the small piece of cardstock. I used Memento ink for this, which allowed me to colour the image with alcohol markers.
Assembly
- I glued the black border layer to the card base.
- Next, I experimented with placement for the focal image and its border layer. In the end I decided to offset them dramatically and glued them in place as shown.
Final Thoughts:
This is one of those times when I had created the background and then set it aside: I just didn’t know what I wanted to do with it. Then one day I pulled out this stamp set and inspiration struck: I think that this fun and funky girl is a great match for the stencilled background.
Supplies: (and links where possible)
I have listed which products I have used, and where they may be purchased. It’s a huge marketplace and in most instances, there are multiple sources and many alternatives to choose from.
Stencil: Mid Century Tower: A Colorful Life Designs
Waffle Flower Grip Mat, 8.5 x 6.5, Scrapbook.com
Versamark Embossing Ink: Simon Says Stamp
Stamps: Impression Obsession (no longer in business)
Dies: Deckled Rectangles , Stampin’ Up! (retired)
Ink: Stampin’ Up!
Blending Brushes: Stampin’ Up!
Versafine Onyx, Simon Says Stamp
Memento Ink: Stampin’ Up!
Alcohol Markers:
Stampin’ Blends: Stampin’ Up!
Copics: Wallacks
Adhesive: Tombow Aqua, Michaels
Card Base & Card Face: Accent 100 lb., Amazon
Do you have comments or thoughts to share on this design? Drop me a line in the Comments Section below – I’d love to hear from you!
You can also use the Comments Section to be added to the list, and notified when I release new work.
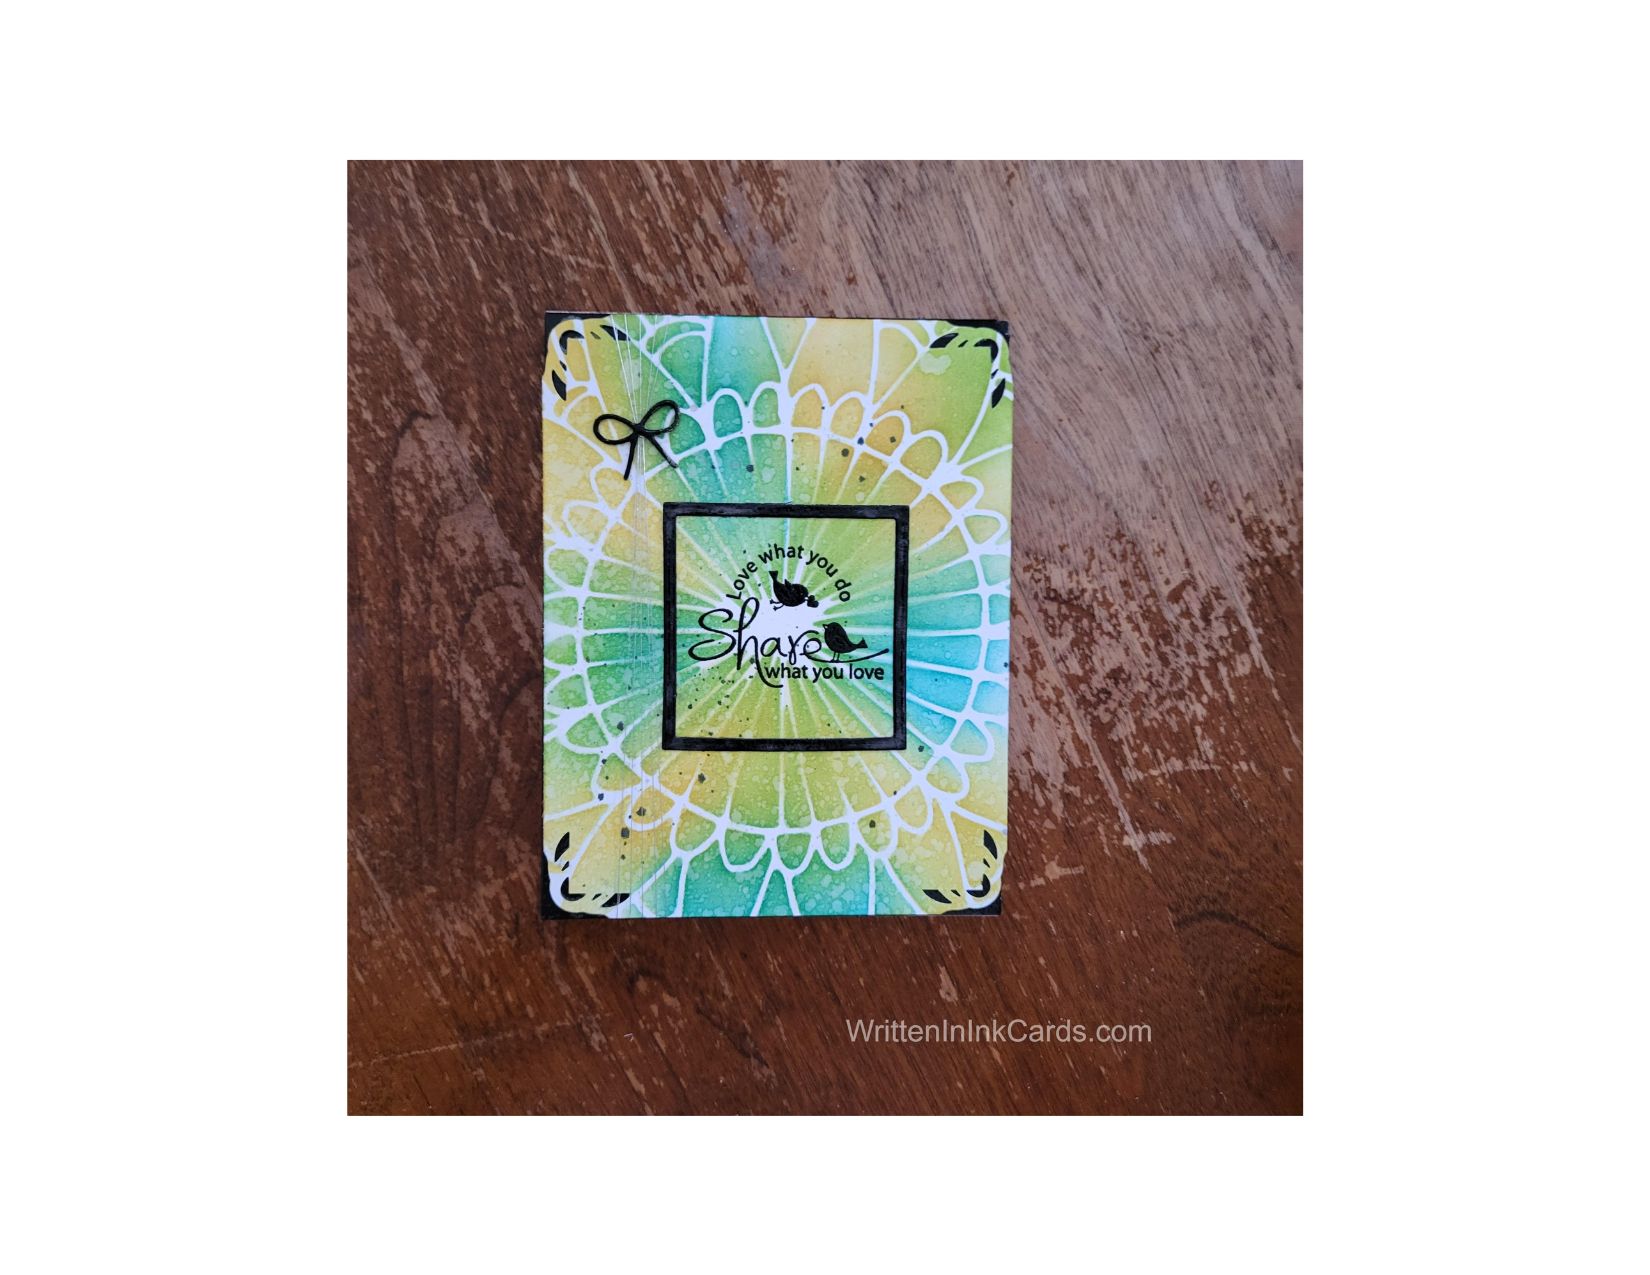
Love What You Do, Share What You Love

Would you like to experiment with a design like this? You’ll find a supply list below, including a link to the stencil I used from A Colorful Life Designs. Follow the link and use discount code ChrisFan10 to save 10% on your entire order! (Master Creator Bundles are excluded as they already have a 20% discount built in.)
This card was created to thank a very talented instructor after a weekend of intense musical coaching. Whether making cards, singing or something else entirely — love what you do, and find time to do it.
Let’s get Started:
Card Base: 5.5 x 8.5, scored and folded at 4.25
Border Layer: 5.5 x 4.25
Card Face: 5.5 x 4.25
Scraps of black cardstock for frame and bow
Card Face:
- I laid the card face down on my Grip Mat and positioned the stencil.
- Using light turquoise, lime green and yellow I applied colour across all exposed surfaces.
- I went back over the entire surface, blending colours where they met and intensifying where necessary.
- I put the card face aside, allowing the ink to dry completely.
- After removing the stencil, I put the card face into the stamp positioner and put my Love What You Do stamp in place.
- I laid a piece of acetate over the card face and stamped on this first to be certain that I was happy with the placement. (Was it straight? Did it need to be higher? lower?) Once I was satisfied that it was centered and straight, I removed the acetate and stamped the image with Versafine Onyx.
Tip: Versafine Onyx is a pigment ink: these stay wet long enough to add embossing powder and set for great results.
- I sprinkled clear embossing powder over the Versafine, and set this with my heat gun.
- I lightly spritzed the card face with water, blotting it off with a paper towel. This added a lot of depth and texture to the card face.
- I used black reinker to add a bit of spatter to the card face.
- I used a punch on all four corners to add visual interest.
Other:
- I created a matching frame: Using two square dies that were very close in size, I taped them onto a scrap of black cardstock and ran them through the Big Shot. This created the small black frame around the stamped image.
- I pressed the square into my embossing ink pad, sprinkled it with clear embossing powder, and set it with my heat gun. (I did this to give the black cardstock the same depth as the sentiment.)
- I used a die to cut the tiny bow out of black cardstock.
- I wrapped silver metallic thread 5 x around the card face vertically on the left hand side. I secured this with adhesive tape on the back of the card.
- Using a small piece of the same thread, I tied a knot around all of the threads, pulling them in towards the center. After snipping off the ends of this thread I added a tiny bead of glue to be certain that the knot couldn’t come undone.
Assembly
- I glued the black border layer to the card base, and the card face on top of both of these. The black peeked through the design cut into the corners and provided a nice contrast.
- I glued the frame in place around the stamped image.
- I glued the bow in place on top of the metallic thread, over the knot.
Final Thoughts:
I didn’t add any embellishments to this card: the strong contrast and multiple textures meant that there was enough visual interest without anything else.
Both card making and singing fall into the Love What You Do category for me, and I am fortunate to be able to include both in my life. What do you love to do? let me know in the comments below.
Supplies: (and links where possible)
I have listed which products I have used, and where they may be purchased. It’s a huge marketplace and in most instances, there are multiple sources and many alternatives to choose from.
Stencil: Boho Wheel, A Colorful Life Designs
Waffle Flower Grip Mat, 8.5 x 6.5, Scrapbook.com
Versamark Embossing Ink: Simon Says Stamp
Clear Embossing Powder: Wow, Simon Says Stamp
Stamps: this a stamp that I’ve had in my stash for a long time, and sadly I cannot
remember where I purchased it.
Dies: Everlasting Squares, Spellbinders, R&R Scrapbooking
Ink: Stampin’ Up!
Blending Brushes: Stampin’ Up!
Versafine Onyx, Simon Says Stamp
Adhesive: Tombow Aqua, Michaels
Card Base & Card Face: Accent 100 lb., Amazon
Do you have comments or thoughts to share on this design? Drop me a line in the Comments Section below – I’d love to hear from you!
You can also use the Comments Section to be added to the list, and notified when I release new work.