Your cart is currently empty!
Tag: winter
Creative & Cozy Card Making: Share a Smile Today!

Would you like to experiment with a design like this? Below, you’ll find a supply list, including a link to the stencils I used from A Colorful Life Designs. Follow the link and use discount code ChrisFan10 to save 10% on your entire order! (Master Creator Bundles are excluded as they already have a 20% discount built in.)
Let’s get Started:
Card Base: 5.5 x 8.5, scored and folded at 4.25
Border Layer: 5.25 x 4
Card Face: 5 ⅛ x 3 7/8
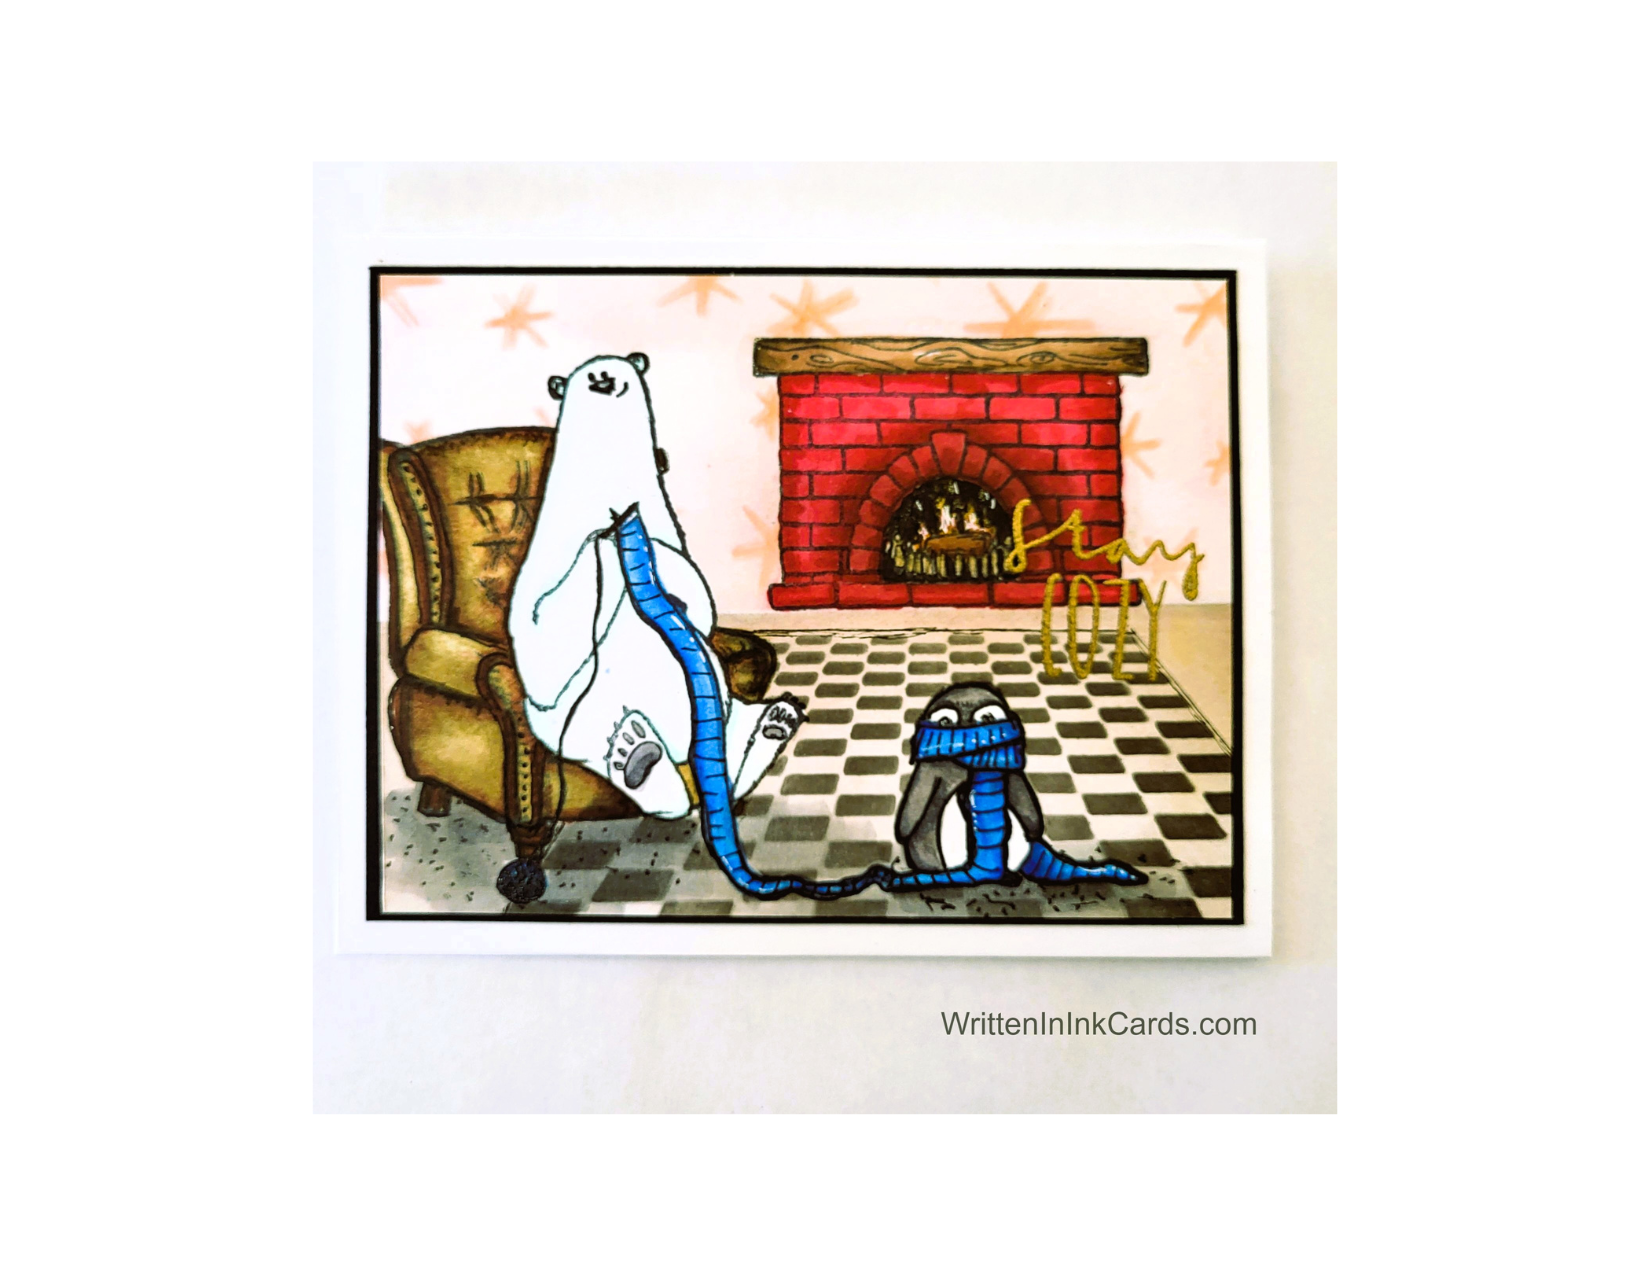
Baby it’s cold outside! Stay cozy.
Card Face:
- I stamped the fireplace, chair, and bear + penguin onto masking paper and cut them out.
- Next, the fireplace and bear + penguin were stamped onto the card face, using Memento Ink.
- I put the mask in place over the bear/penguin image and then stamped the chair.
This created the effect of the bear sitting in the chair without any portions of the two images interfering with each other.
- I coloured each of the images with alcohol markers. I used a gold gel pen to colour the andirons in the fireplace; I also used a black fine liner to colour around the flames so they would have more presence.
- I put the masks in place on all three images before putting the stencil in place to create the area rug on the floor. I added black ink to the exposed areas to create the checkered pattern.
- I used the Sparkles stencil to create the wallpaper, using a soft hand and orange ink.
- I added a shadow under the chair and penguin, as well as towards the junction of the floor and wall.
- I decided on a couple of final touches – I used white gel pen here and there on the scarf as well as on the flames in the fireplace.
- I put the card face into my stamp positioner and stamped the sentiment with Versamark embossing ink before adding gold embossing powder and setting it with my heat gun.
Assembly
- I glued the black border layer to the card base and then added the card face on top of these, centering both carefully.
Final Thoughts:
I was really happy with this whimsical scene when it was completed. Looking at it now I would make the shadows around the fireplace and where the floor meets the wall a bit darker and more apparent, but overall I’m satisfied.
Supplies: (and links where possible)
I have listed which products I have used, and where they may be purchased. It’s a huge marketplace; in most instances, there are multiple sources and many alternatives.
Stencils: Floor Perspective, A Colorful Life Designs
Sparkles: A Colorful Life Designs
Waffle Flower Grip Mat, 8.5 x 6.5, Scrapbook.com
Versamark Embossing Ink: Simon Says Stamp
Gold Embossing Powder: Wow, Simon Says Stamp
Stamps: Knitting Bear, Colorado Craft Company
Cozy Greetings, Unity Stamps
Ink: Stampin’ Up!
Blending Brushes: Stampin’ Up!
White Gel Pens: Arteza, Amazon
Fine Liners: Amazon
Memento Ink: Stampin’ Up!
Alcohol Markers:
Stampin’ Blends: Stampin’ Up!
Copics: Wallacks
Adhesive: Tombow Aqua, Michaels
Card Base & Card Face: Accent 100 lb., Amazon